
Today’s post is about integrating a database, such as MySQL into a Python web application. I will use SQAlchemy and Flask together for this. I think it will be mainly useful for those who are primarily Python programmers without a lot of SQL knowledge. This is because SQLAlchemy, a python library, allows us to interact with a MySQL database from within Python.
I’m not an expert, but I figured that I could help someone who wants to get started with a project.
Expectations
I’ll go over a very simple Flask app example that can track an investment portfolio of cryptocurrencies. From other articles, you could say that I am very interested in crypto. I’ll provide more details as we move along.
To keep it short, I’m assuming you are already familiar with Flask. You don’t need to be an expert (I’m definitely not) but you need to know enough Flask that even if you don’t understand something, you can figure out what the code does by carefully reading it. I will write other posts with more detailed discussions on Flask later on.
Required Installations
There are a few packages we need to install to get started. Here is a condensed list of the major programs and Python libraries I used in this project:
- OS: Ubuntu 20.04.3 LTS (I think any OS will be pretty similar)
- MySQL version 8.0.28
- mysqlclient (python library)
- Flask (v2.0.2)
- Flask-SQLAlchemy (v2.5.1)
- Flask-WTF (v1.0.0) and WTForms (v3.0.0) (installing flask-wtf will install wtforms automatically)
- Flask-Bootstrap (for the visual part like the html)
- Pandas (v1.4.0)
- PyYAML (v6.0)
Selecting a Database
First, you need to decide which database you want to use. Most people start with SQLite since it is very simple to set up and use. However, since it does not support high-precision decimals, I decided to go with MySQL. There are open-source options such as MariaDB and PostgreSQL that may be even more advanced. I will probably try those in the future.
In any case, one of the advantages of using a tool like SQLAlchemy is that the database implementation is abstracted from the model creation.
That means that you can define your models and table schema in Python and SQLAlchemy will deal with the database in the background. You can even swap databases without significantly changing your code later down the road.
Since there are many options and I don’t want to make this post too long, I will not cover the database installation here. Just make sure to have the SQL server running and to have some sort of root user set up. In case you are wondering, I used this tutorial by DigitalOcean to install MySQL on my system.
Python Libraries
I recommend installing all of these Python libraries inside a virtual environment. It is always good practice to compartmentalize your projects. The following commands will install the latest available packages from the command line:
- Install mysqlclient so Python can talk to the MySQL server
pip install mysqlclient
If you are getting some errors installing mysqlclient, take a look here to see if installing a few extra dependencies fixes the issue.
- Install Flask and Flask-related libraries to build the app
pip install flask
pip install -U Flask-WTF    #the -U upgrades the package if it is already installed
- Now we install Flask-SQLAlchemy. It is a wrapper around SQLAlchemy that provides some convenience when working with Flask applications. In the future I will explore using SQLAlchemy with Flask directly.
pip install -U Flask-SQLAlchemy
- Flask-bootstrap. This library is used in the visual part. I don’t actually know much about web design, so a lot of the html code I use, I take from the web and modify it to my needs. Flask-bootstrap is often used to improve the look of the page and to make it responsive.
pip install flask-bootstrap
- Finally, we install pandas. It is not required, but I find it useful when querying the database. I’m also adding an installation for PyYaml. It is a package for reading yaml configuration files. It is also not required. However, I like to keep the database credentials in a configuration file, separate from the code, that I then read with PyYaml.
pip install pandas
pip install PyYAML

Example Portfolio Tracker
With all the installations out of the way, we can start building the application. I will first create a new user and a new database in MySQL. If your database is different, or you already have one set up, you can skip to the next step.
In order to keep the post short, I will not include all the code here, just the most important snippets. The whole project is on my Github repository. The project structure looks like this:
- app.py
- models.py
- forms.py
- tools.py
- db_config.yml
- templates/
- home.html
- portfolio.html
- transactions.html
- static/
- styles/
- df_styles.css
- styles/
Creating Dummy MySQL Database and User
In this step, we will create a simple toy database from the MySQL command-line interface.
Login to the MySQL console as the root user:
mysql -u root -p
The “-p” will prompt you to enter your user password. Now we will create our toy database “test_db” and a new user “test_user”. Then we will grant administrator privileges on “test_db” to “test_user”. The following commands are SQL.
CREATE DATABASE test_db;
Now we create the user and set up a password for it:
CREATE USER 'test_user'@'localhost' IDENTIFIED BY 'fake_password';
Grant all privileges to the user we just created.
GRANT ALL PRIVILEGES ON test_db.* TO 'test_user'@'localhost';
FLUSH PRIVILEGES;
You can give different privileges. The command above gives all privileges to user ‘test_user’ for all tables in database ‘test_db’ (that’s what the .* is for). If you wanted to give access to only a particular table, you would name it like so: “… … test_db.some_specific_table …”
Next, you can log out from the current MySQL session by entering \q in the terminal and then log back in with the newly created user. However, now it’s time to move to the Python side.
Defining Table Schemas With Flask-SQLAlchemy in “models.py”
An ORM is an Object-Relational Mapper. It allows you to write object-oriented code in Python that can then be mapped to a database. In this case, the ORM is Flask-SQLAlchemy (it’s actually a wrapper to the real ORM: SQLAlchemy).
In our project folder, I’m creating a file named “models.py”. This file will contain the Python objects that represent individual records on our database. However, before we do that, we need to decide what database tables we will have. For this project, a simple database could be:
- Cryptocurrencies
- Transactions
- We could have another table for “Exchanges” but we’ll keep it simple for now
In “models.py” we will have the following:
# some imports and database setup
from flask_sqlalchemy import SQLAlchemy
from sqlalchemy.orm import backref

db = SQLAlchemy()  #our db handler
Then we have the actual objects.
Cryptocurrency class
class Cryptocurrency(db.Model):
    __tablename__ = 'cryptocurrencies'

    id           = db.Column(db.Integer,
                             db.Sequence('cryptocurrencies_id_seq'),
                             primary_key=True)
    ticker       = db.Column(db.String(32) ,
                             nullable=False, unique=True)
    last_updated = db.Column(db.DateTime,
                             server_default=db.func.now(),
                             onupdate=db.func.now())

    transactions = db.relationship('Transaction',
                                   backref='cryptocurrencies',
                                   lazy=True)

    def __init__(self, ticker,):
        self.ticker = ticker

    def __repr__(self):
        return f"<Coin: ticker={self.ticker}>"
Let’s take a closer look at this class.
On line 1, we are inheriting from the db.Model class. This is important to create the table correctly. The next line defines the table name linked to this object. In this case, the table is named “cryptocurrencies”
After that, from lines 4 to 11 we define the table columns and their data types using the db.Column type. Values for the first column, id, will be created automatically and each new row in the table will automatically get assigned a higher number (that’s what the db.Sequence object is for). Just pass the name of your table followed by “_id_seq“. We are also selecting this column as the primary key.
One thing to keep in mind is that the variable names you choose here will become the actual column names in your database table.
For the ticker column, we are telling SQLAlchemy that this value must be unique.
ticker = db.Column(db.String(32) , nullable=False, unique=True)
That means that no two entries can contain the same crypto ticker symbol.
I also wanted to explain a bit more about the last_updated column. I include that column in most tables as a record of when that row was last modified:
last_updated = db.Column(db.DateTime,
                         server_default=db.func.now(),
                         onupdate=db.func.now())
When a new object is created, the database will automatically set this value to the current server time. Moreover, any time that particular row is modified, the value in last_updated will be updated. Those two actions are accomplished by passing appropriate functions to the parameters server_default (for when the row is first created) and onupdate (when any value in the row changes).
Finally, we also define a relationship with our other model, the Transaction class:
transactions = db.relationship('Transaction',
                               backref='cryptocurrencies',
                               lazy=True)
This relationship allows us to automatically create a foreign key on our next table, transactions.
Also, remember to include an __init__ method where you can pass the parameters to the class. Here, the __init__ method only takes a ticker parameter because the rest are created automatically.
Transaction class
class Transaction(db.Model):
    __tablename__ = 'transactions'

    id         = db.Column(db.Integer,
                           db.Sequence('transactions_id_seq'),
                           primary_key=True)
    ticker_id  = db.Column(db.Integer,
                           db.ForeignKey('cryptocurrencies.id'),
                           nullable=False)
    num_coins  = db.Column(db.Numeric(19,9, asdecimal=True),
                           nullable=False)
    cost_basis = db.Column(db.Numeric(19,5, asdecimal=True),
                           nullable=False)
    last_updated = db.Column(db.DateTime,
                             server_default=db.func.now(),
                             onupdate=db.func.now())

    def __init__(self, num_coins, cost_basis):
        self.num_coins  = num_coins
        self.cost_basis = cost_basis

    def __repr__(self):
        return f"<Transaction: ticker_id={self.ticker_id}, coins={self.num_coins}, cost basis={self.cost_basis}>"
We are linking this class to a new table transactions which will store each individual record. You will notice on line 7, the column ticker_id is a db.ForeignKey. Foreign keys allow SQL tables to be linked together. In this case, instead of storing the currency symbol directly on this table, we are storing its corresponding id from the cryptocurrencies table.
You could store the symbol directly, but the table cryptocurrencies could eventually hold a lot of other information about each coin. For instance: website, market cap, etc. Therefore, I keep them separate and linked through foreign keys.
The other new type here is db.Numeric. It is a useful data type for values that require high precision, such as storing currency information.
In our case, we need high precision because of the way cryptocurrencies are divided. For instance, each Bitcoin can be divided into 100 million satoshis, or 0.00000001 BTC, or 9 decimal places. It gets worse for Ethereum and Ethereum-based blockchains. Each Ether can be divided into 10^18 Wei, so we need 18 decimal places.
That’s the reason I’m using the db.Numeric type here:
num_coins  = db.Column(db.Numeric(19,9, asdecimal=True),
                       nullable=False)
The first argument to db.Numeric , 19, is the total number of digits in our number. The second number, 9, is how many of the 19 digits will be used for decimal places. I chose 9 because it is enough for Bitcoin, and going larger also means using up more storage space.
The other parameter, asdecimal, keeps the value as a Python decimal.Decimal data type when set to True. When set to False, the value is forced into a float, which can have precision errors.
Table Schemas
The tables generated by the code above will result in the following schema in MySQL:


Configuration File for Our Database
I prefer to use a Yaml file to define the database configuration. SQLAlchemy needs access to that information to authenticate with the database. I named my configuration file db_config.yml which is at the root of the project folder.
Here is what my configuration file looks like for this project:
database  : 'mysql'
username  : 'test_user'
password  : 'fake_password'
host      : 'localhost'
port      : 3306
db_name   : 'test_db'
If you clone my repository, you will have to create this file yourself since it is not included there.
Most of the fields are pretty self-explanatory. Just put the values from the database steps we did above. For host, I am using localhost because my MySQL server is running locally on my computer.
To find the port number, type the following in your MySQL database (only if you are using MySQL):
SHOW GLOBAL VARIABLES LIKE 'PORT';
Generating a Database URI
The URI for the database is like a URL that tells SQLAlchemy all the information it needs to connect to it. We can form the URI with the info above, from the configuration file. It will look like this:
mysql://test_user:fake_password@localhost:3306/test_db
However, I wrote a convenience function in tools.py called generate_uri_from_file to handle URI creation. It takes the config file name as a parameter and returns the URI string.
App.py
App.py is the file we run with Python to kickstart the web app. It contains the setup for connecting Flask and our database. Here is also where we define our web app routes or API.
I created three routes (or pages) for this project:
- home
- portfolio
- transactions
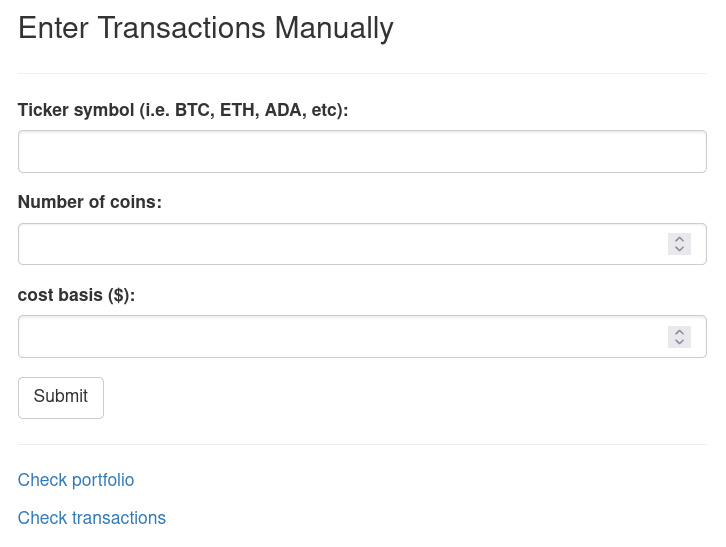
Each of those routes is accompanied by some HTML template. “Home” is the main route where we input a transaction into the database. This input is collected by a Flask-WTForm defined in forms.py and entered into the database.
Check the repository for the whole code. Here I will just bring attention to these two snippets from app.py:
#--------Add URI to flask
database_URI = generate_uri_from_file('db_config.yml')
app.config['SQLALCHEMY_TRACK_MODIFICATIONS'] = False
app.config['SQLALCHEMY_DATABASE_URI'] = database_URI
and
# Initialize database and create all tables if they don't exist
db.init_app(app)
with app.app_context():
    db.create_all()
In the first one, we are passing the URI to Flask so it can operate on the database. The second snippet initializes the database and creates the tables if they don’t exist.
>> warning: once you run app.py for the first time, your tables will be created. If you later modify the models in models.py, those changes will not reflect in your database. You have to delete the modified tables from MySQL and then run app.py again.
To delete the tables from the MySQL command-line, log in with to your database and then:
USE test_db;
DROP tables cryptocurrencies, transactions;
I’ll cover querying the database with SQLAlchemy and pandas in a future post. In the meantime, study the Portfolio and Transactions routes in app.py for good examples.
Launching the App
Launch the app from the terminal by going to the project folder and running app.py:
python app.py
You should see something like:

When you go to the HTTP address there, you will be greeted by the home page:

The other two are only for looking at the data already present.
“Transactions” shows a view of every transaction in the transactions table of our database. On the other hand, “portfolio” shows a view of the total amounts per coin:


Conclusion
You can now go and test the app for yourself. Again, the full code is in this Github repo. Even though I rushed through the Flask portion, I feel comfortable with the explanations given about using Flask-SQLAlchemy.
I hope you can see the potential for improving your applications when using SQLAlchemy and Flask together.
This project is actually a mini version of a much larger one I have been working on. It is a portfolio tracker for myself. You can check the code at this repo.
Feel free to leave a comment with any questions or suggestions for this or other projects. Also, if you are interested, I have a newsletter sign-up form at the bottom of the page. You can sign-up with your email and you can receive useful information from time to time, or stay in touch.