
AI-generated media, more specifically images and video, has been circulating online in the past few weeks. These images were created using text-to-image systems, such as DALL-E 2, Stable Diffusion, Imagen, or Craiyon (formerly DALL-E Mini).
I thought it would be interesting to dedicate this post to exploring the capabilities of Stable Diffusion. Therefore, I will not explain how Stable Diffusion works at a technical level, since I’m learning that myself. Instead, I will cover the text-to-image script provided in the project’s GitHub repository and showcase some outputs here.
If you want to simply follow along, I found this stable diffusion engine running online. You can try it without having to install anything on your computer, although it has limited options. For something more robust, you can try DreamStudio after creating an account.
Here is a short video I posted to my YouTube channel about using Stable Diffusion:
Text-to-Image And Image-to-Image Systems
A text-to-image system, as the name implies, takes a text prompt (a sentence, or description of the image you want) and outputs an image containing the scene you described.

In an image-to-image process, instead of providing just the text, you feed the algorithm an existing image plus some text. The program will use your inputs and create a new image that takes the one you provided as a base to build from it. You can tell the software how much change or noise you want to apply to the image through the strength parameter.

For this post, I’ll focus on the first case, text-to-image. I’ll write more in a follow-up article about image-to-image so this one is not too long.
How to Setup Stable Diffusion On Your Computer
Downloading and installing stable diffusion is relatively simple. You need to download the latest model from Hugging Face (about 7 GB) and then download the code from the Github repository. The README file at that repository contains instructions on how to set everything up. Additionally, this post here goes over every step more carefully, especially for Windows users. You need to have a graphics card with a decent amount of VRAM.
Basically, you need git , and conda for managing a Python virtual environment with all the required libraries. Git is used for downloading the code, although you can download it from the GitHub repository as a zip file as well.
On the other hand, If you prefer to use a GUI, I found a fork of the official repository that implements one. I have not tried it yet, but I’ll probably switch to it. I can see that it would be convenient for testing different configurations without trying to remember all the command line flags for the script.
Here is a screenshot of what you can expect running this version of stable diffusion locally:

One of the features I like about this fork is live previewing, so you can see the image generated in real-time, step by step. It also provides a more straightforward installation than the official repository.
How to Run The Stable Diffusion Script
You will be able to run stable diffusion using the command line after the setup above. Here is a simple example of how to run the text-to-image script:
python scripts/txt2img.py --plms --n_iter 1 --n_samples 4 --prompt "man eating potato"
Here is a description of the flags I used above:
--plms: the sampler that produces the image. There are more options but I have only tried this one.--n_samples: number of images generated per de-noising step--n_iter: number of de-noising steps. In the example above,--n_iteris equal to 1, so there is one de-noising step. The program will producen_samplesnumber of images per step. In this case, that would be 4 images in total, or {n_iter x n_samples}.--promp: the text describing what the output image should look like.
One of the output images I got is:

For a full list of possible command line flags, run this:
python scripts/txt2img.py --help
Some Tips on Writing Prompts
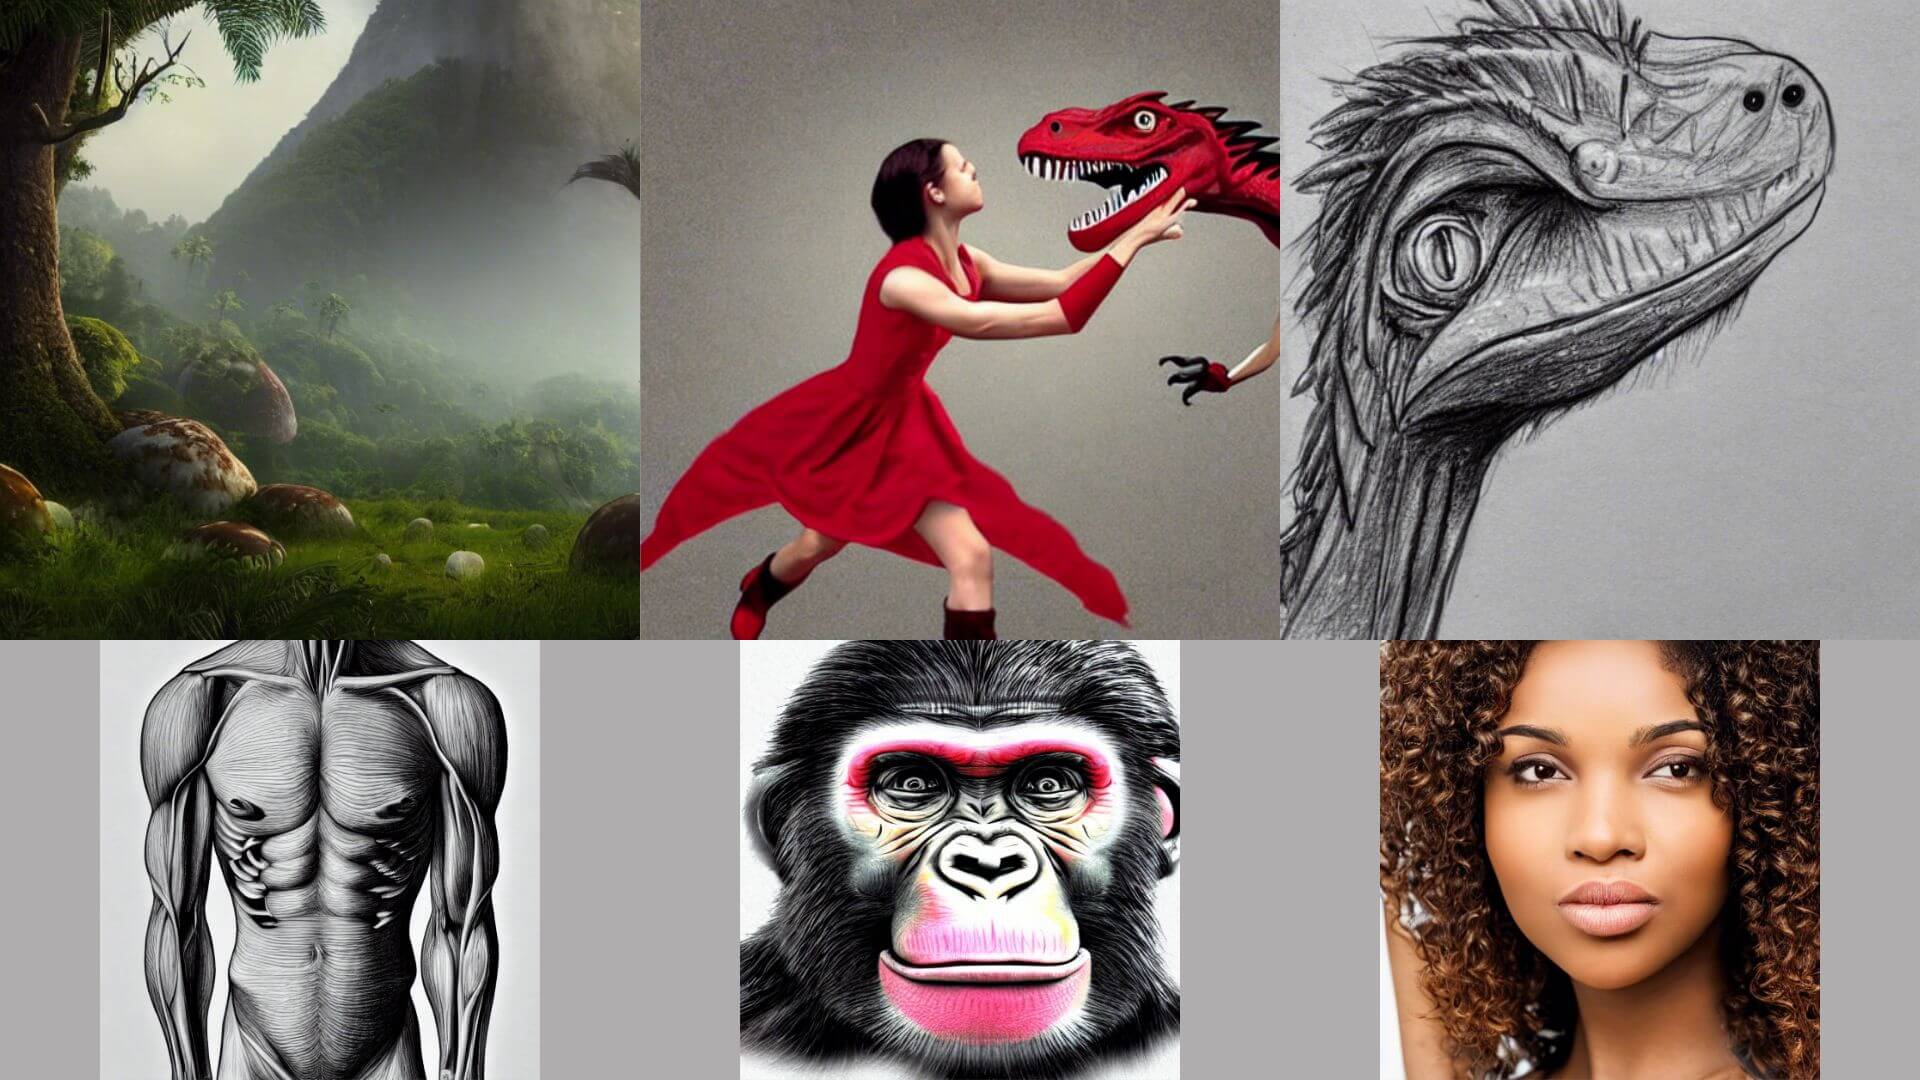
I really like how you can let your imagination run free and ask for almost anything. Many results will pleasantly surprise you. For instance, here are some outputs for the prompt: “a girl in a red dress punching a velociraptor in the face, pencil sketch, 8K UHD, photorealistic”.


The images above come from variations of the prompt I just shared. I liked them enough to put them here, but I did not record exactly the one I used at the time. However, the example demonstrates how to build a successful prompt.
To begin with, you want to be specific about what the scene should contain. In my prompt, I indicated that the image should contain a girl in a red dress. I also specified that she should be punching a velociraptor. As you can see, the network produced images that were very close to what I asked.
Keeping in mind that I’m no expert at this, I noticed that the system usually produces better images when I ask for a pencil sketch or a painting. Also, sometimes adding phrases such as “photorealistic”, “hyperrealistic”, or “4K/8K UHD” (or variations of it) will result in better images.
I find that without very technical knowledge about prompts, I get good results when I ask for landscapes or specific objects. Take a look at this official prompt guide on Dreamstudio for more guidance.
Extra Details
You can provide extra details to the prompt by separating them with commas (,). In the example above, my main prompt was “a girl in a red dress punching a velociraptor in the face”. However, as I mentioned above, I also added: “pencil sketch”, “8K UHD”, and “photorealistic” in the text. Sometimes the effect of the extra details on the prompt is minor, but other times it can be meaningful. You can see the difference in this example:
- prompt 1: “A painting of a ship sailing from a port at dusk, romantic”

- prompt 2: “A painting of a ship sailing from a port at dusk”

I simply removed the word “romantic” from the end of the prompt and produced two different images. They are not that different, but still, there are discrepancies (primarily in the shape of the ship).
Stable Diffusion Prompts to Try
Here is a list of prompts that you can try and which result in interesting images:
- “A bored APE NFT of a pirate ape, jpg, cartoon, colorful”
- “A girl in a red dress punching a velociraptor in the face, pencil sketch, 8K UHD, photorealistic”
- “sunset of forest and mountains during fall”
- “cute bunny with sharp teeth playing poker”
- “An oil painting of a ship sailing from a port at dusk”
- “Dense forest with mushrooms, foggy, mystical, hyperrealistic”
- “pencil sketch of the human body, anatomy, medicine, photorealistic, 8K UHD”
Please share other cool prompts in the comments so we can all benefit. After a quick online search, I found these pages with prompts and resources for prompt creation that I think are very useful:
- https://mpost.io/best-100-stable-diffusion-prompts-the-most-beautiful-ai-text-to-image-prompts/
- https://decentralizedcreator.com/4-free-prompt-generators-for-stable-diffusion/
Disabling the Safety Check (NSFW Filter)
The stable diffusion code comes with a built-in safety check or NSFW filter. This filter is supposed to block pornographic images. I’m not sure if it also blocks gore and similar things. You will notice if the filter was activated because instead of your desired image, you get rick-rolled:

So, why would you want to disable this feature?
There are a couple of reasons for disabling the NSFW filter. For one, it is not always accurate, leading to annoying false positives. This could be extra frustrating if you were running a large batch of prompts or output images, only to find that many were blocked unnecessarily in the end.
Additionally, it seems the NSFW filter model requires a sizeable amount of VRAM to run, and if you have a modest graphics card, that VRAM could be allocated to the diffusion model instead.
One way of getting rid of the filter is to simply use a fork of the stable diffusion code, where it has been removed. I haven’t tested the code myself, but it is an option.
Another way that is also very simple is to disable the filter in your local copy of the code. To do that, you can go to the scripts folder under the repository root and open the file txt2img.py with a code editor. You will find the filter function at around line 87 check_safety. You can simply edit it out:
# def check_safety(x_image):
#     safety_checker_input = safety_feature_extractor(numpy_to_pil(x_image), return_tensors="pt")
#     x_checked_image, has_nsfw_concept = safety_checker(images=x_image, clip_input=safety_checker_input.pixel_values)
#     assert x_checked_image.shape[0] == len(has_nsfw_concept)
#     for i in range(len(has_nsfw_concept)):
#         if has_nsfw_concept[i]:
#             x_checked_image[i] = load_replacement(x_checked_image[i])
#     return x_checked_image, has_nsfw_concept

def check_safety(x_image):
    return x_image, False
Here, the new function simply returns the original image without running any code, and a False boolean, indicating that no NSFW content was detected.
Adding an NSFW Filter Toggle
If you would like to add a toggle to turn this feature on or off at will, you can edit the file in the following way instead (in this case, ignore the previous code and leave the check_safety function in its original state). In the scripts folder, open txt2img.py and modify it in the following way:
#you can add an additional command line argument after line 228
...
	parser.add_argument(
        "--nsfw_filter",
        action="store_true",
        help="Boolean Flag to enable the built-in safety check and NSFW filter"
  )
...
The flag we added above will keep the safety filter OFF by default. If you want to turn it on, you just pass the flag --nswf_filter from the command line when running the script. Optionally, if you would rather have the filter ON by default, then set the action attribute to store_false instead.
Finally, scroll down and find the line where the script calls the check_safety function (around line 309 in the original script). We will add a conditional:
...
	if opt.nsfw_filter:
      x_checked_image, has_nsfw_concept = check_safety(x_samples_ddim)
  else:
      x_checked_image = x_samples_ddim
...
Ethical Considerations of Stable Diffusion
Whether you disable the safety filter or not, remember to follow the license restrictions that come with the project. Among others, there are limitations to using this software in ways that would harm others, or spread misinformation.
Another ethical problem is the copy of artists’ styles without their consent. I recently read an article where a digital artist discovered that someone had fine-tuned a stable diffusion model specifically for her style of art. I wanted to add this section here for you to think about after you leave.
Conclusion
I’m glad that a tool like stable diffusion is available for everyone to use as an open-source project. I just began trying it and will post more content related to it in the future. One of the things I want to explore more is the Hugging Face stable diffusion API, so that I can write interesting Python scripts using stable diffusion. Additionally, I want to write another post going into more detail about all the options and syntax related to stable diffusion prompts.
You can also subscribe to my YouTube channel for videos on Python projects, automation, and crypto:
Finally, if you want to stay connected and up to date on what I post, you can join my newsletter here. I want this newsletter to be a useful resource of tips and tricks I learn and also a place to talk about new projects I might work on.